Reconstitution Basics for Research Settings
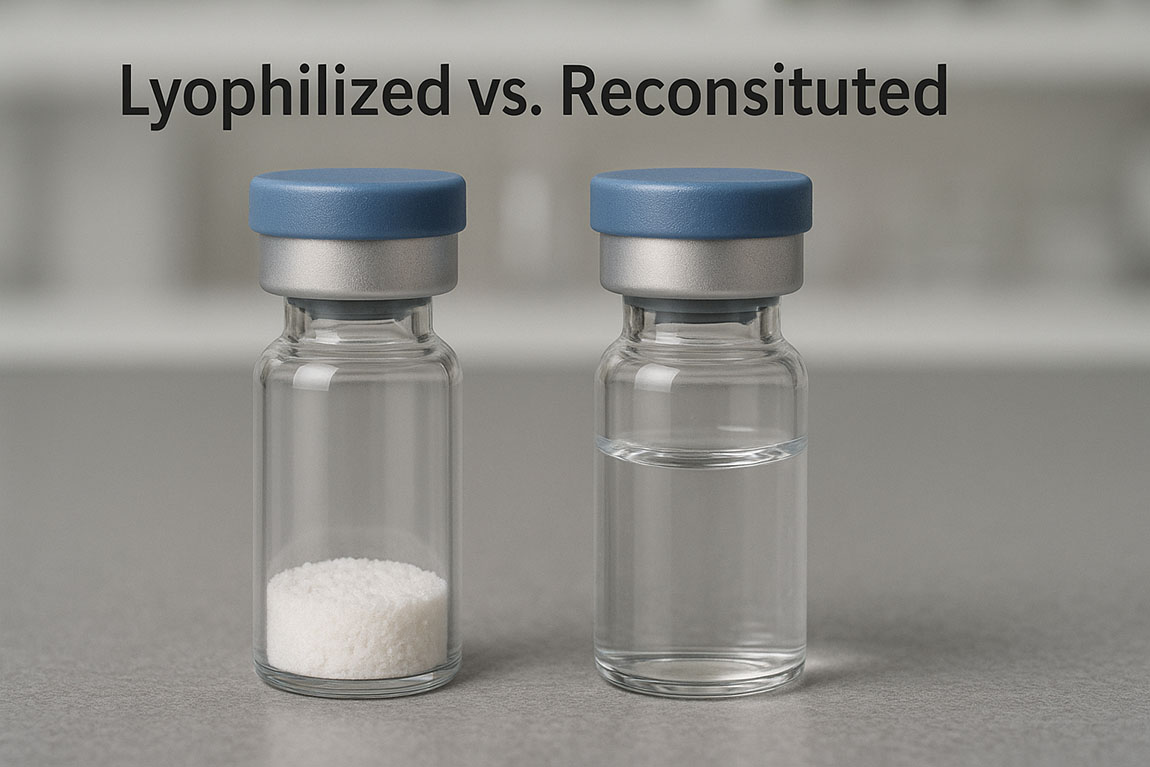
Lyophilised (freeze-dried) peptides are widely used in laboratory research because the dry format can support transport and short-term handling stability. However, the usability of any peptide typically depends on how it is brought back into solution. This article covers reconstitution basics for research settings: how to think about solvent selection, practical handling to reduce variability, sterility considerations, storage and aliquoting practices, and common troubleshooting observations.
This content is educational and intended for laboratory workflows. It does not provide medical claims, treatment advice, or dosing guidance. Always follow your organisation’s SOPs, risk assessments, and method requirements.
1) What “reconstitution” means in peptide research
In research contexts, reconstitution refers to dissolving a lyophilised peptide into a suitable solvent (or solvent system) to create a stock solution that can be used for downstream experimental steps. Although the concept is straightforward, outcomes can differ substantially depending on:
- Peptide sequence and physicochemical properties (hydrophobicity, net charge, tendency to aggregate)
- Solvent composition (water, buffer, co-solvents) and pH/ionic strength
- Handling conditions (temperature, mixing approach, time to equilibrate)
- Container and consumable choices (adsorption to plastic, low-bind options)
- Downstream assay constraints (compatibility with enzymes, cells, chromatography, MS, etc.)
For more hands-on lab guidance beyond this overview, see the Practical articles hub.
2) Before you start: planning for reproducibility
Confirm what you received and how it was stored
Before opening a vial, review any accompanying documentation (e.g., lot details, stated content, purity/analytical notes where provided) and check storage history. Large temperature swings and repeated warming cycles can introduce moisture into lyophilised materials. If your workflow includes long-term stock management, it can help to review Peptide storage basics (research) and ensure your lab’s practices match your intended stability window.
Define the downstream requirement first
Solvent choice should be driven primarily by downstream compatibility. A stock solution that looks “clear” is not automatically fit for purpose if it disrupts assay conditions, changes ionic strength, suppresses MS signal, or interferes with binding readouts. A practical approach is to write down:
- Your target stock concentration range (based on assay sensitivity and dilution scheme)
- The allowable solvent components at the point of assay (e.g., buffer, salt, co-solvent tolerance)
- Any sterility or bioburden constraints for your research system
- Required storage temperature and number of planned freeze–thaw cycles
If you are standardising buffers across projects, the overview in Buffers and solution prep for research workflows may be useful for aligning solution preparation practices.
3) Choosing a solvent system: practical decision points
There is no universally “best” solvent for every peptide. Many dissolve readily in water, while others require buffering, pH adjustment, or carefully selected co-solvents. The aim is to select a solvent system that achieves reliable solubility and stability and is compatible with the downstream method.
Start simple: water or buffer when feasible
For many peptides, sterile water or a compatible buffer is a reasonable starting point. Water minimises added components and is often compatible with analytical methods. Buffers may be preferred when pH stability is important for your assay or when the peptide’s charge state strongly affects solubility.
When selecting a buffer, consider whether ionic strength or specific ions could influence aggregation, binding, or assay background. Document the final pH and buffer composition to support reproducibility and data interpretation.
When bacteriostatic water might be considered
Some laboratories use bacteriostatic water in workflows that involve repeated access to a stock solution, where limiting microbial growth is a practical concern. One example is BAC Water, a sterile water option containing a bacteriostatic agent. Use this type of solvent only if it is compatible with your downstream assay and analytical readouts, and ensure it aligns with your internal SOPs. Any additive (even at low levels) can affect sensitive systems, including enzyme kinetics, fluorescence background, or certain cell-based readouts.
Hydrophobic peptides and adsorption risk
Hydrophobic sequences and certain modifications can show reduced apparent solubility or increased surface adsorption. In these cases, outcomes may depend on tube material, concentration, and mixing method. Practical mitigations include:
- Using low-bind tubes where feasible
- Keeping handling steps consistent across replicates and batches
- Avoiding unnecessarily low intermediate concentrations when preparing working stocks (to reduce relative losses on surfaces)
Because adsorption can be method- and sequence-dependent, it is good practice to validate recovery for critical experiments, particularly when working near detection limits.
4) A stepwise reconstitution workflow (research-focused)
The goal of a reconstitution workflow is consistency. The same peptide can behave differently when reconstituted under slightly different conditions, so a standardised approach helps reduce experimental noise.
Step 1: Prepare the workspace and materials
If sterility matters for your application, work in an appropriate clean environment (e.g., a biosafety cabinet or validated clean bench), and use sterile consumables. Minimise time with containers open and avoid contact with sterile surfaces. For foundational guidance, see Aseptic technique basics for lab handling and Avoiding contamination in peptide preparation.
Step 2: Allow vials and solvents to equilibrate
Condensation is a common source of unintended moisture when cold vials are opened in warmer, humid air. Allow the vial (and solvent) to equilibrate to the working environment as dictated by your SOP before opening. This is particularly relevant for highly hygroscopic materials and for workflows where mass accuracy and concentration calculations are critical.
Step 3: Add solvent thoughtfully
Add the selected solvent in a controlled manner so the lyophilised cake (if present) is wetted effectively. Some laboratories prefer adding solvent down the vial wall to reduce foaming or splashing, especially for peptides that tend to form films. After solvent addition, allow time for wetting and initial dissolution before applying more aggressive mixing.
Step 4: Mix gently first, then escalate if needed
Start with gentle swirling or inversion. If the peptide does not dissolve, you may increase mixing intensity in a stepwise manner, while considering whether agitation could introduce foam or increase surface losses. Excessive vortexing is not always beneficial; it may aerate the solution or promote adsorption in some workflows. The best approach is to use the least forceful mixing that achieves repeatable dissolution and then keep that approach consistent across experiments.
Step 5: Verify appearance and, if relevant, confirm concentration
Visual inspection is a useful first check (clear vs. hazy vs. particulate), but it is not a substitute for analytical confirmation where accuracy is important. Depending on your research needs, concentration may be checked using a validated method (e.g., UV absorbance for peptides with suitable chromophores, amino acid analysis, or another fit-for-purpose assay). If you do calculate concentration from mass and volume, document assumptions such as stated content, salt form, and any counterions, since these can affect how “mg” translates to molar concentration.
5) Sterility, contamination control, and filtration trade-offs
Not every peptide experiment requires sterility, but contamination control generally improves reliability. Microbial growth can change pH, introduce proteases, and add background signals in certain assays. The appropriate level of control depends on your system and risk assessment.
Practical contamination controls
- Use clean, designated areas for solution prep
- Use sterile tips/tubes when required by your protocol
- Minimise open-container time
- Avoid repeated access to the same stock where possible (use aliquots)
- Label clearly with identity, solvent system, date, and operator initials
Filtration: useful in some workflows, but validate recovery
Sterile filtration may be appropriate in some research settings, but it can also lead to peptide loss due to adsorption on the filter membrane, especially at low concentrations or with hydrophobic peptides. If filtration is considered, validate:
- Compatibility of the membrane material with your peptide and solvent
- Recovery (pre- vs post-filtration concentration or activity readout)
- Impact on downstream assay background
Where adsorption risk is high, an alternative may be to maintain aseptic handling practices rather than relying on filtration alone, depending on your SOP and experimental constraints.
6) Aliquoting and storage after reconstitution
After reconstitution, aliquoting is commonly used to preserve sample integrity and reduce variability. This approach limits repeated freeze–thaw cycles and reduces contamination opportunities from repeated vial access.
Why freeze–thaw management matters
Freeze–thaw cycles can contribute to aggregation, precipitation, or concentration drift (e.g., through evaporation during handling). The severity depends on peptide properties and solvent composition. If your workflow requires repeated use across days or weeks, plan aliquot sizes around typical experimental runs. For practical guidance, see Freeze–thaw handling and aliquoting tips.
Container choice and headspace considerations
Low-bind tubes can reduce adsorption in some applications. Also consider headspace and sealing integrity to reduce evaporation and concentration changes during storage. Maintain consistent storage temperatures and avoid unnecessary temperature cycling when retrieving aliquots.
7) Troubleshooting common observations
Even with a standard workflow, peptides can behave unpredictably due to sequence-dependent solubility and interactions with buffers, salts, and surfaces. The key is to record observations and make controlled, documented adjustments.
Cloudiness or haze
Cloudiness may indicate incomplete dissolution, micro-precipitation, or incompatibility between the peptide and solvent system. Consider allowing time to equilibrate, re-evaluating pH and ionic strength, or adjusting solvent composition in a way that remains compatible with your downstream assay. Avoid making multiple changes at once; incremental adjustments are easier to interpret.
Visible particles or precipitate
Particles can reflect undissolved material, aggregation, or insoluble contaminants introduced during handling. If particles persist, consider whether your method allows gentle clarification steps, but validate that any such step does not remove peptide through adsorption or co-precipitation.
Unexpectedly low signal in an assay
Low signal may result from adsorption to plastics, incorrect concentration calculations (e.g., salt form not accounted for), degradation under unsuitable conditions, or interference from solvent additives. Controls that can help isolate causes include:
- Preparing a fresh aliquot with identical steps
- Comparing tube types (standard vs low-bind)
- Running a blank with the same solvent composition
- Using an orthogonal quantification approach where feasible
Foaming during mixing
Foam can increase surface exposure and complicate volume accuracy. If foaming occurs, reduce agitation intensity, consider mixing by gentle inversion, and allow bubbles to dissipate before measurement or aliquoting. Maintain consistent technique across samples to reduce variability.
8) Documentation: the overlooked part of reconstitution basics
In many labs, the largest gains in reliability come from documentation rather than changing solvents. A simple reconstitution record supports reproducibility within and across teams. Consider recording:
- Peptide identity, lot/batch reference, and stated content
- Date/time of reconstitution and operator
- Solvent system (including buffer, pH, salts, and any additives)
- Mixing approach and time to dissolve
- Observations (clarity, particulates, colour)
- Aliquoting scheme and storage location/temperature
- Any deviations from SOP and the rationale
This level of detail helps interpret downstream results and can reduce time spent troubleshooting later.
FAQ
What does “reconstitution” mean for lyophilised peptides?
In research settings, reconstitution is the process of dissolving a lyophilised (freeze-dried) peptide into a suitable solvent to create a usable stock solution for laboratory experiments.
How do I choose the right solvent for reconstitution?
Choose a solvent system based on peptide properties (e.g., hydrophobicity/charge) and, most importantly, compatibility with your downstream method (assay, buffer requirements, instrumentation, and sterility needs). Document the final solvent composition for reproducibility.
What is BAC water and why might a lab use it?
BAC water (bacteriostatic water) is sterile water containing a bacteriostatic agent that can help limit microbial growth in certain multi-use handling workflows. It should only be used when it won’t interfere with your assay or research method.
Is sterile water always the best choice for peptide reconstitution?
Not always. Some peptides dissolve readily in water, while others may require buffered conditions or a different solvent approach to achieve reliable solubility and stability for a specific research protocol.
Should I vortex a peptide solution to help it dissolve?
Start with gentle mixing (swirling or inversion) and only increase agitation if needed and appropriate for your molecule and method. Excessive agitation can introduce foam or contribute to losses on tube surfaces in some workflows.
My reconstituted solution looks cloudy—what does that indicate?
Cloudiness can indicate incomplete dissolution, micro-precipitation, or incompatibility between the peptide and the solvent/buffer system. Note the observation, allow time to equilibrate, and reassess solvent choice and handling conditions according to your SOP.
How can I reduce contamination risk during reconstitution?
Use a clean work area, sterile consumables when required, minimise the time containers are open, and avoid contacting sterile surfaces. Aliquoting can also reduce repeated handling of the same stock.
Why is aliquoting recommended after reconstitution?
Aliquoting supports consistency by reducing repeated freeze–thaw exposure and limiting contamination opportunities, which can help maintain sample integrity across experiments.
Do peptides stick to plastic labware?
Some peptides can adsorb to certain plastics, especially at low concentrations or with hydrophobic sequences. Using low-bind tubes and consistent handling can help reduce variability.
Can I filter a reconstituted peptide solution for sterility?
Filtration may be used in some research workflows, but it can also lead to material loss through adsorption. If filtration is considered, validate recovery and compatibility with your peptide and downstream assay.
Further reading within polypeptides.uk
- Practical articles hub
- Peptide storage basics (research)
- Aseptic technique basics for lab handling
- Avoiding contamination in peptide preparation
- Freeze–thaw handling and aliquoting tips
- Buffers and solution prep for research workflows
If your workflow includes bacteriostatic handling approaches and they are compatible with your assay, you can also review BAC Water as a research solvent option.